Preserve Your Cake: Best Freezing & Thawing Methods
Imagine the delightful dilemma: a celebration has concluded, and you're left with an abundance of delicious cake. While the thought of finishing it all sounds tempting, sometimes even the sweetest treats can become overwhelming. The good news? You don't have to let a single crumb go to waste! Mastering **how to freeze cake** effectively means you can savour those celebratory flavours long after the party lights dim. Freezing cake isn't just about preventing spoilage; it's about extending joy, allowing you to enjoy a perfect slice whenever a craving strikes, or saving a tier from a wedding cake for an anniversary.
This comprehensive guide will walk you through the expert-approved techniques for freezing and thawing your cake, ensuring it emerges from the freezer as fresh and delicious as the day it was baked. We'll delve into the science behind preventing freezer burn and condensation, giving you all the tools to become a cake-preserving pro.
Why Freezing Your Cake is a Sweet Idea
Beyond the obvious benefit of preventing food waste, freezing cake offers a remarkable convenience. Think about those spontaneous dessert cravings or unexpected guests – a perfectly preserved slice of cake can be ready in no time. It's also an invaluable technique for bakers who like to work ahead, allowing them to prepare components or even entire cakes in advance of an event. Freezing locks in moisture and flavour, protecting your meticulously crafted dessert from going stale or developing unpleasant freezer odours. With the right method, your cake can maintain its sublime taste and texture for weeks, even months, offering a delightful treat whenever you desire.
The Ultimate Guide: How to Freeze Cake Like a Pro
The secret to perfectly frozen cake lies in meticulous preparation and proper wrapping. Following these steps will ensure your cake remains fresh, moist, and free from freezer burn. For a deeper dive into long-term storage, check out our guide on
How to Freeze Cake: Keep it Fresh & Delicious for Months.
Preparation is Key: Cool & Configure
Before any wrapping can begin, your cake needs to be in optimal condition.
*
Cool Completely: This is perhaps the most critical initial step. Ensure your cake is *absolutely* at room temperature before attempting to freeze it. Freezing a warm cake will create condensation inside the wrapping, leading to ice crystals and a soggy texture when thawed. Give it ample time to cool, often several hours, depending on its size.
*
Whole or Sliced? You have options!
*
Whole Cakes (or Tiers): If you're freezing an entire cake (e.g., a wedding cake tier), ensure any delicate decorations are removed or secured. Freezing a whole cake can be beneficial for larger pieces, though thawing will take longer.
*
Individual Slices: For everyday indulgence, cutting the cake into desired serving-sized pieces before freezing is highly recommended. This allows you to thaw just what you need, reducing waste and speeding up the thawing process significantly. A sharp, warm knife makes for clean cuts.
The Art of Airtight Wrapping
This multi-layered approach is your cake's shield against freezer burn, moisture loss, and absorbing unwanted odours from the freezer.
1.
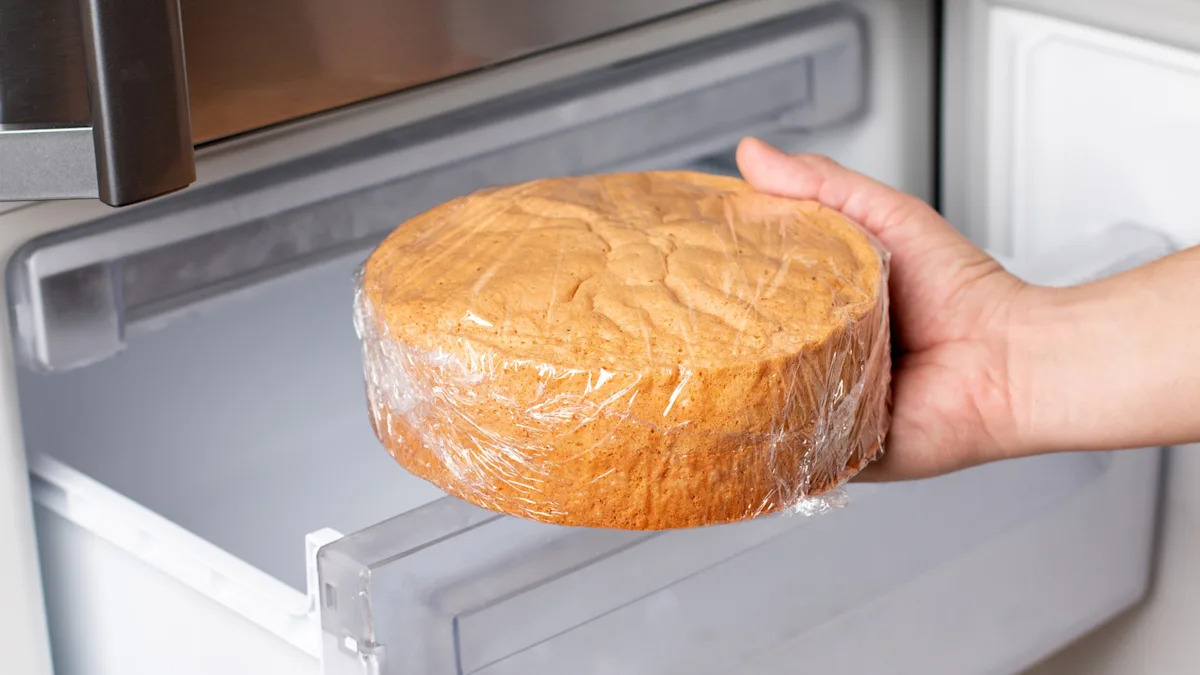
The First Layer: Direct Plastic Wrap Contact
* As soon as your cake (whole or sliced) is completely cool, begin wrapping it tightly with a high-quality plastic wrap. The key here is to ensure the plastic wrap is in
direct contact with the cake's surface, leaving no air pockets. For frosted cakes, this means the plastic should gently press against the frosting. This initial layer is crucial as it creates an airtight barrier, preventing moisture from escaping and freezer odours from seeping in. Wrap it thoroughly, ensuring all surfaces are covered.
2.
The Second Layer: Reinforced Plastic Protection
* Add a second, equally tight layer of plastic wrap. This doubles down on the protection, providing an extra barrier against air and ensuring any small gaps from the first layer are sealed. Think of it as your cake's first line of defence, made extra robust.
3.
The Third Layer: Aluminum Foil for Freezer Burn Defence
* Once the cake is encased in two layers of plastic wrap, wrap it tightly in a layer of heavy-duty aluminum foil. The foil acts as an additional impenetrable barrier against freezer burn and temperature fluctuations, which can be detrimental to your cake's texture. It also helps to shield the cake from any strong smells that might be lurking in your freezer.
4.
The Final Layer: Freezer-Safe Bags or Containers
* For an extra layer of protection, particularly for individual slices, place the thoroughly wrapped cake pieces into a freezer-safe, airtight ziplock bag or a rigid, airtight freezer container. This provides structural integrity, preventing your cake from getting squashed, and adds yet another barrier against air and odours. If using a bag, gently press out as much excess air as possible before sealing.
Label & Lodge: The Final Freezing Steps
*
Label Clearly: Before placing your cake in the freezer, use a permanent marker to clearly write the contents (e.g., "Chocolate Birthday Cake") and the date it was frozen on the outside of the freezer bag or container. This simple step is invaluable for keeping your freezer organized and ensuring you consume the cake within its optimal freshness window (typically 1-2 months for best quality, though it can be safe to eat for longer).
*
Optimal Placement: Place your carefully wrapped and labelled cake in a part of the freezer where it won't be easily crushed or disturbed. A flat surface is ideal for whole cakes to maintain their shape.
Thawing Your Frozen Cake: Expert Strategies for Perfect Texture
While freezing cake correctly is vital, the thawing process is equally, if not more, critical to preserving its delightful texture and preventing a gummy or soggy outcome. The key here, as shared by experts like Samantha Merritt, creator of The Baker's Almanac, is a slow, gradual thaw. For more in-depth advice on this, refer to
Avoid Soggy Cake: Expert Thawing Tips for Perfect Texture.
The Golden Rule of Thawing: Keep it Wrapped!
This is the most crucial piece of advice for thawing any cake, especially one with frosting. As the cake warms, condensation will naturally form. If you unwrap the cake while it's still cold, this condensation will form directly on the cake itself, making it wet, gummy, or soggy.
*
Allow Condensation to Form on the Wrapping: By keeping the cake tightly wrapped during the entire thawing process, any condensation that forms will occur on the outside of the plastic and foil layers, protecting the cake from moisture saturation.
Patience is a Virtue: Fridge Thaw vs. Counter Thaw
The method you choose depends on the size of your cake and how quickly you need it. However, a fridge thaw is almost always superior for maintaining texture.
*
The Recommended Method: Fridge Thaw (for Whole Cakes & Frosted Slices)
* For a whole cake, or even generously frosted individual slices, thawing in the refrigerator is the expert-approved method. Place the still-wrapped cake in the fridge and allow it to thaw slowly.
*
Timing: A large, whole cake can take anywhere from 12-24 hours to thaw completely in the refrigerator, sometimes longer depending on its density. Individual slices will thaw much faster, typically 2-4 hours. This slow transition from frozen to chilled significantly mitigates condensation on the cake's surface and helps maintain its original moist texture.
*
The Quicker Method: Counter Thaw (for Unfrosted Slices or Plain Cake)
* If you're thawing a small, unfrosted slice of cake, or a simple pound cake without delicate frosting, you can often get away with thawing it on the kitchen counter at room temperature.
*
Timing: A single, average-sized slice will usually thaw in about 1-2 hours on the counter. However, remember the condensation risk is higher with this method, so it's best reserved for less delicate cakes or if you're truly in a hurry. Always keep it wrapped until it's completely thawed.
When to Unwrap and Serve
Once your cake has fully thawed using your chosen method (and is still wrapped!), you can finally unwrap it. For fridge-thawed cakes, allow them to sit at room temperature for about 20-30 minutes after unwrapping before serving. This allows the cake to reach a more enjoyable eating temperature and enhances its flavours.
Not All Cakes Are Created Equal: Freezing Considerations
While many cakes freeze beautifully, it's important to note that some types of cakes and, more specifically, certain frostings fare better than others in the freezer.
*
Cakes That Freeze Well: Most butter-based cakes, sponge cakes, pound cakes, chocolate cakes, and even cheesecakes generally freeze exceptionally well. Their denser structure helps them retain moisture.
*
Frostings That Freeze Well: Buttercream, cream cheese frosting, and ganache tend to freeze and thaw beautifully. These frostings are primarily fat-based, which helps protect the cake and themselves from freezer burn. When thawing, these frostings might look a little dull initially, but often regain their sheen and texture once they come to room temperature.
*
Frostings to Be Wary Of: Frostings with a high water content, such as meringue-based frostings (like boiled icing or seven-minute frosting), or those made with raw egg whites, can sometimes weep or separate upon thawing, affecting both texture and appearance. Delicate whipped cream toppings are also best added fresh after the cake has thawed, as they can lose their airy consistency.
*
Fruit Fillings: Cakes with fresh fruit fillings (especially berries or tropical fruits) might become slightly mushy or release more liquid upon thawing. Cooked fruit fillings, like apple or cherry pie filling, generally hold up much better.
Always consider the components of your cake before freezing. When in doubt, it's often better to freeze the unfrosted cake layers and then frost them fresh after thawing.
Conclusion
Freezing cake is a culinary superpower that transforms a potential waste into a future delight. By meticulously following the steps for **how to freeze cake** – from proper cooling and airtight wrapping to the critical, slow thawing process – you can preserve your favourite sweet treats with confidence. No more guilt over leftover birthday cake or rushing to finish a delicious dessert before it spoils. Embrace these expert methods, and you'll unlock a world of convenient, fresh-tasting cake whenever you please. So go ahead, bake an extra batch, freeze those slices, and extend the sweetness of your celebrations!